This document will guide you through the steps necessary to setup computing resources for use in CS 307.
Even if you have a setup that you have used for previous courses, we still require you to follow this guide to avoid potential compatibility issues between your environment and the one we expect you to have.
We strongly recommend following the Remote Setup instructions for using NCSA’s new Illinois Computes Research Notebooks service.
Alternatively, if you feel sufficiently technologically competent and would prefer to have a local development environment, you can follow the Local Setup instructions.
Both setups implement the CS 307 technology stack, which has three core elements:
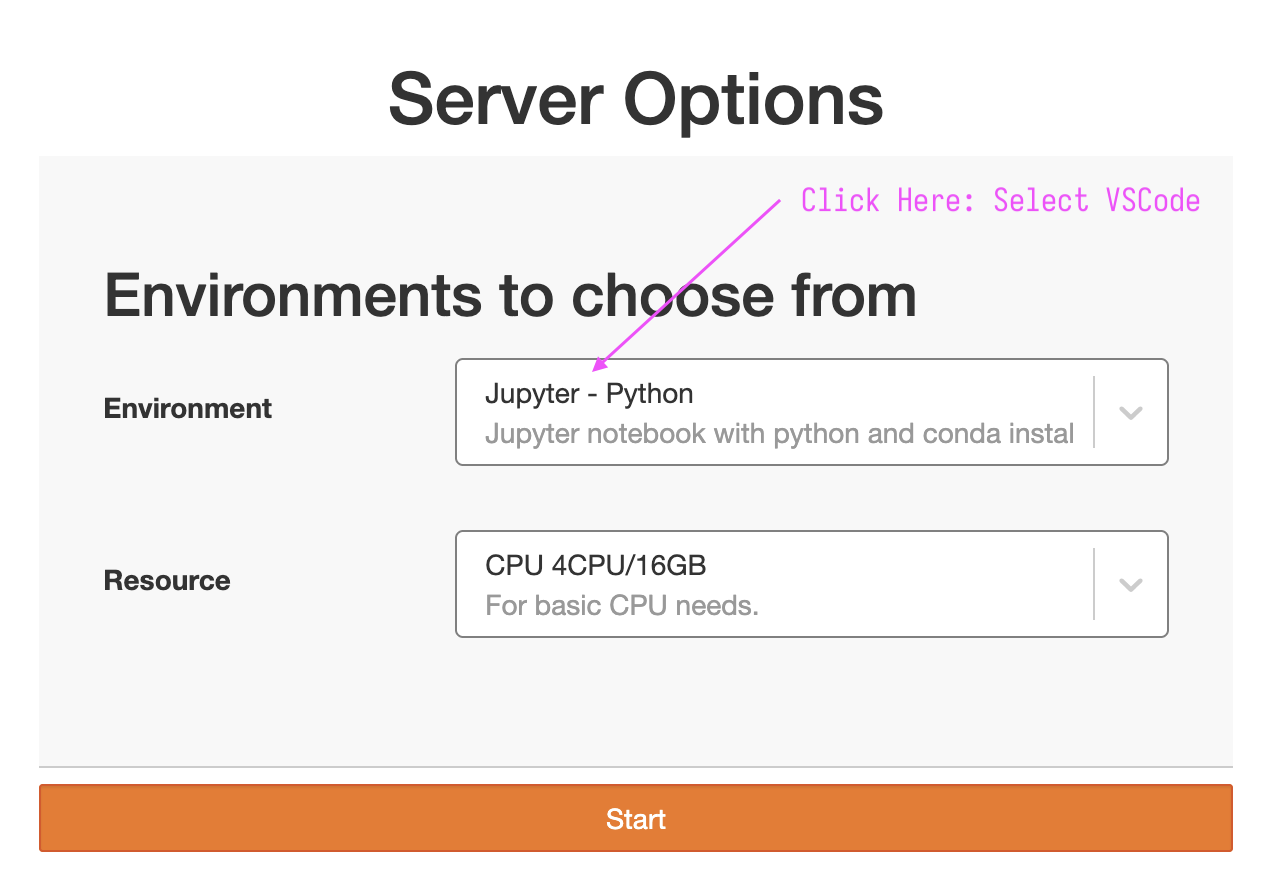
After login, you will land on a page with options seen in Figure 1.
Figure 1: ICRN Environment and Resource Selection
Importantly, for the environment, select Visual Studio Code. You do not need to modify the resource selector. Once you have selected VSCode, click “Start” to proceed.
CS 307 Setup
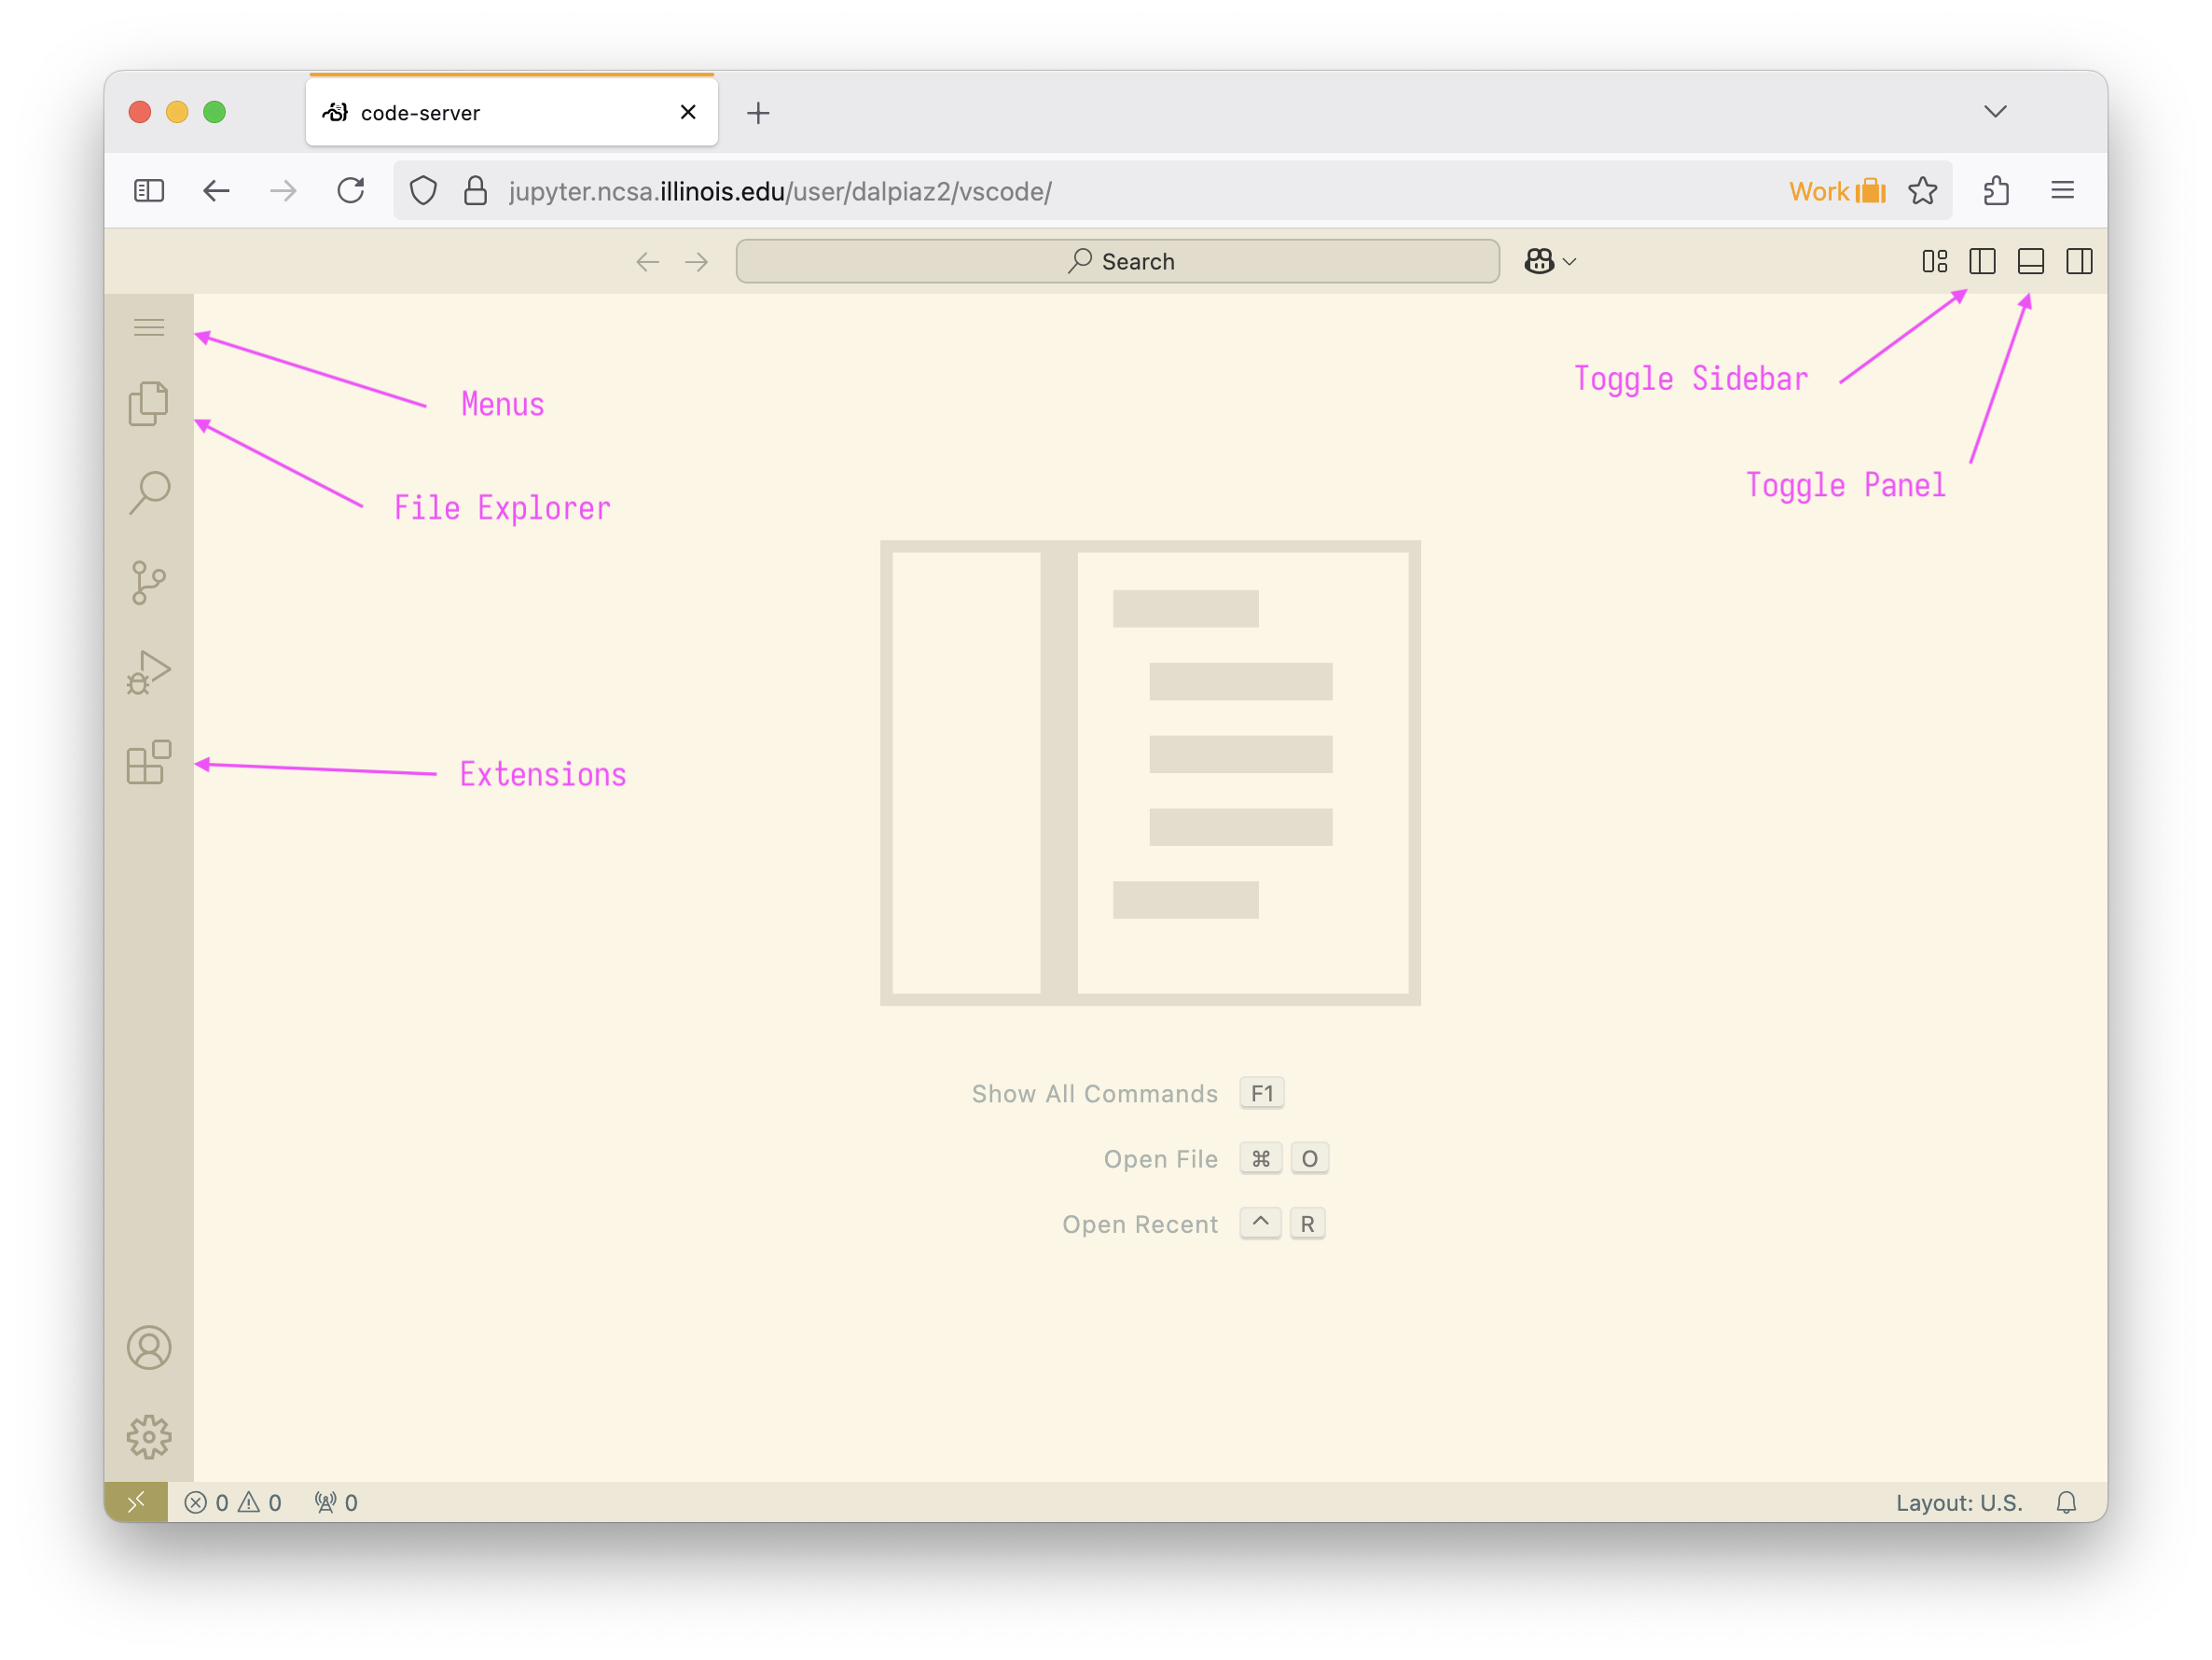
Once the environment has launched, you will see a mostly familiar VSCode interface, similar to Figure 2.
Figure 2: ICRN VSCode Interface
This interface allows you to run code on NCSA servers, but through the VSCode interface in a web browser. The interface is nearly identical to running VSCode locally. One notable difference is the method of accessing the usual menus, which is now a button as indicated in Figure 2.
To use ICRN for CS 307, some additional setup is required in order to install the software necessary to complete labs. To automate this process as much as possible, we provide a script that will largely complete these tasks.
This command will take a few minutes to complete, as it is essentially performing all of the steps described above for the local setup, including creating a CS 307 folder. When complete, the process will print this message:
✓ Setup complete!
Be sure open the cs307 folder in VSCode before continuing!
Do not interrupt this process before it completes, and be sure to follow that last instruction about opening the cs307 folder, which we describe in the next section.
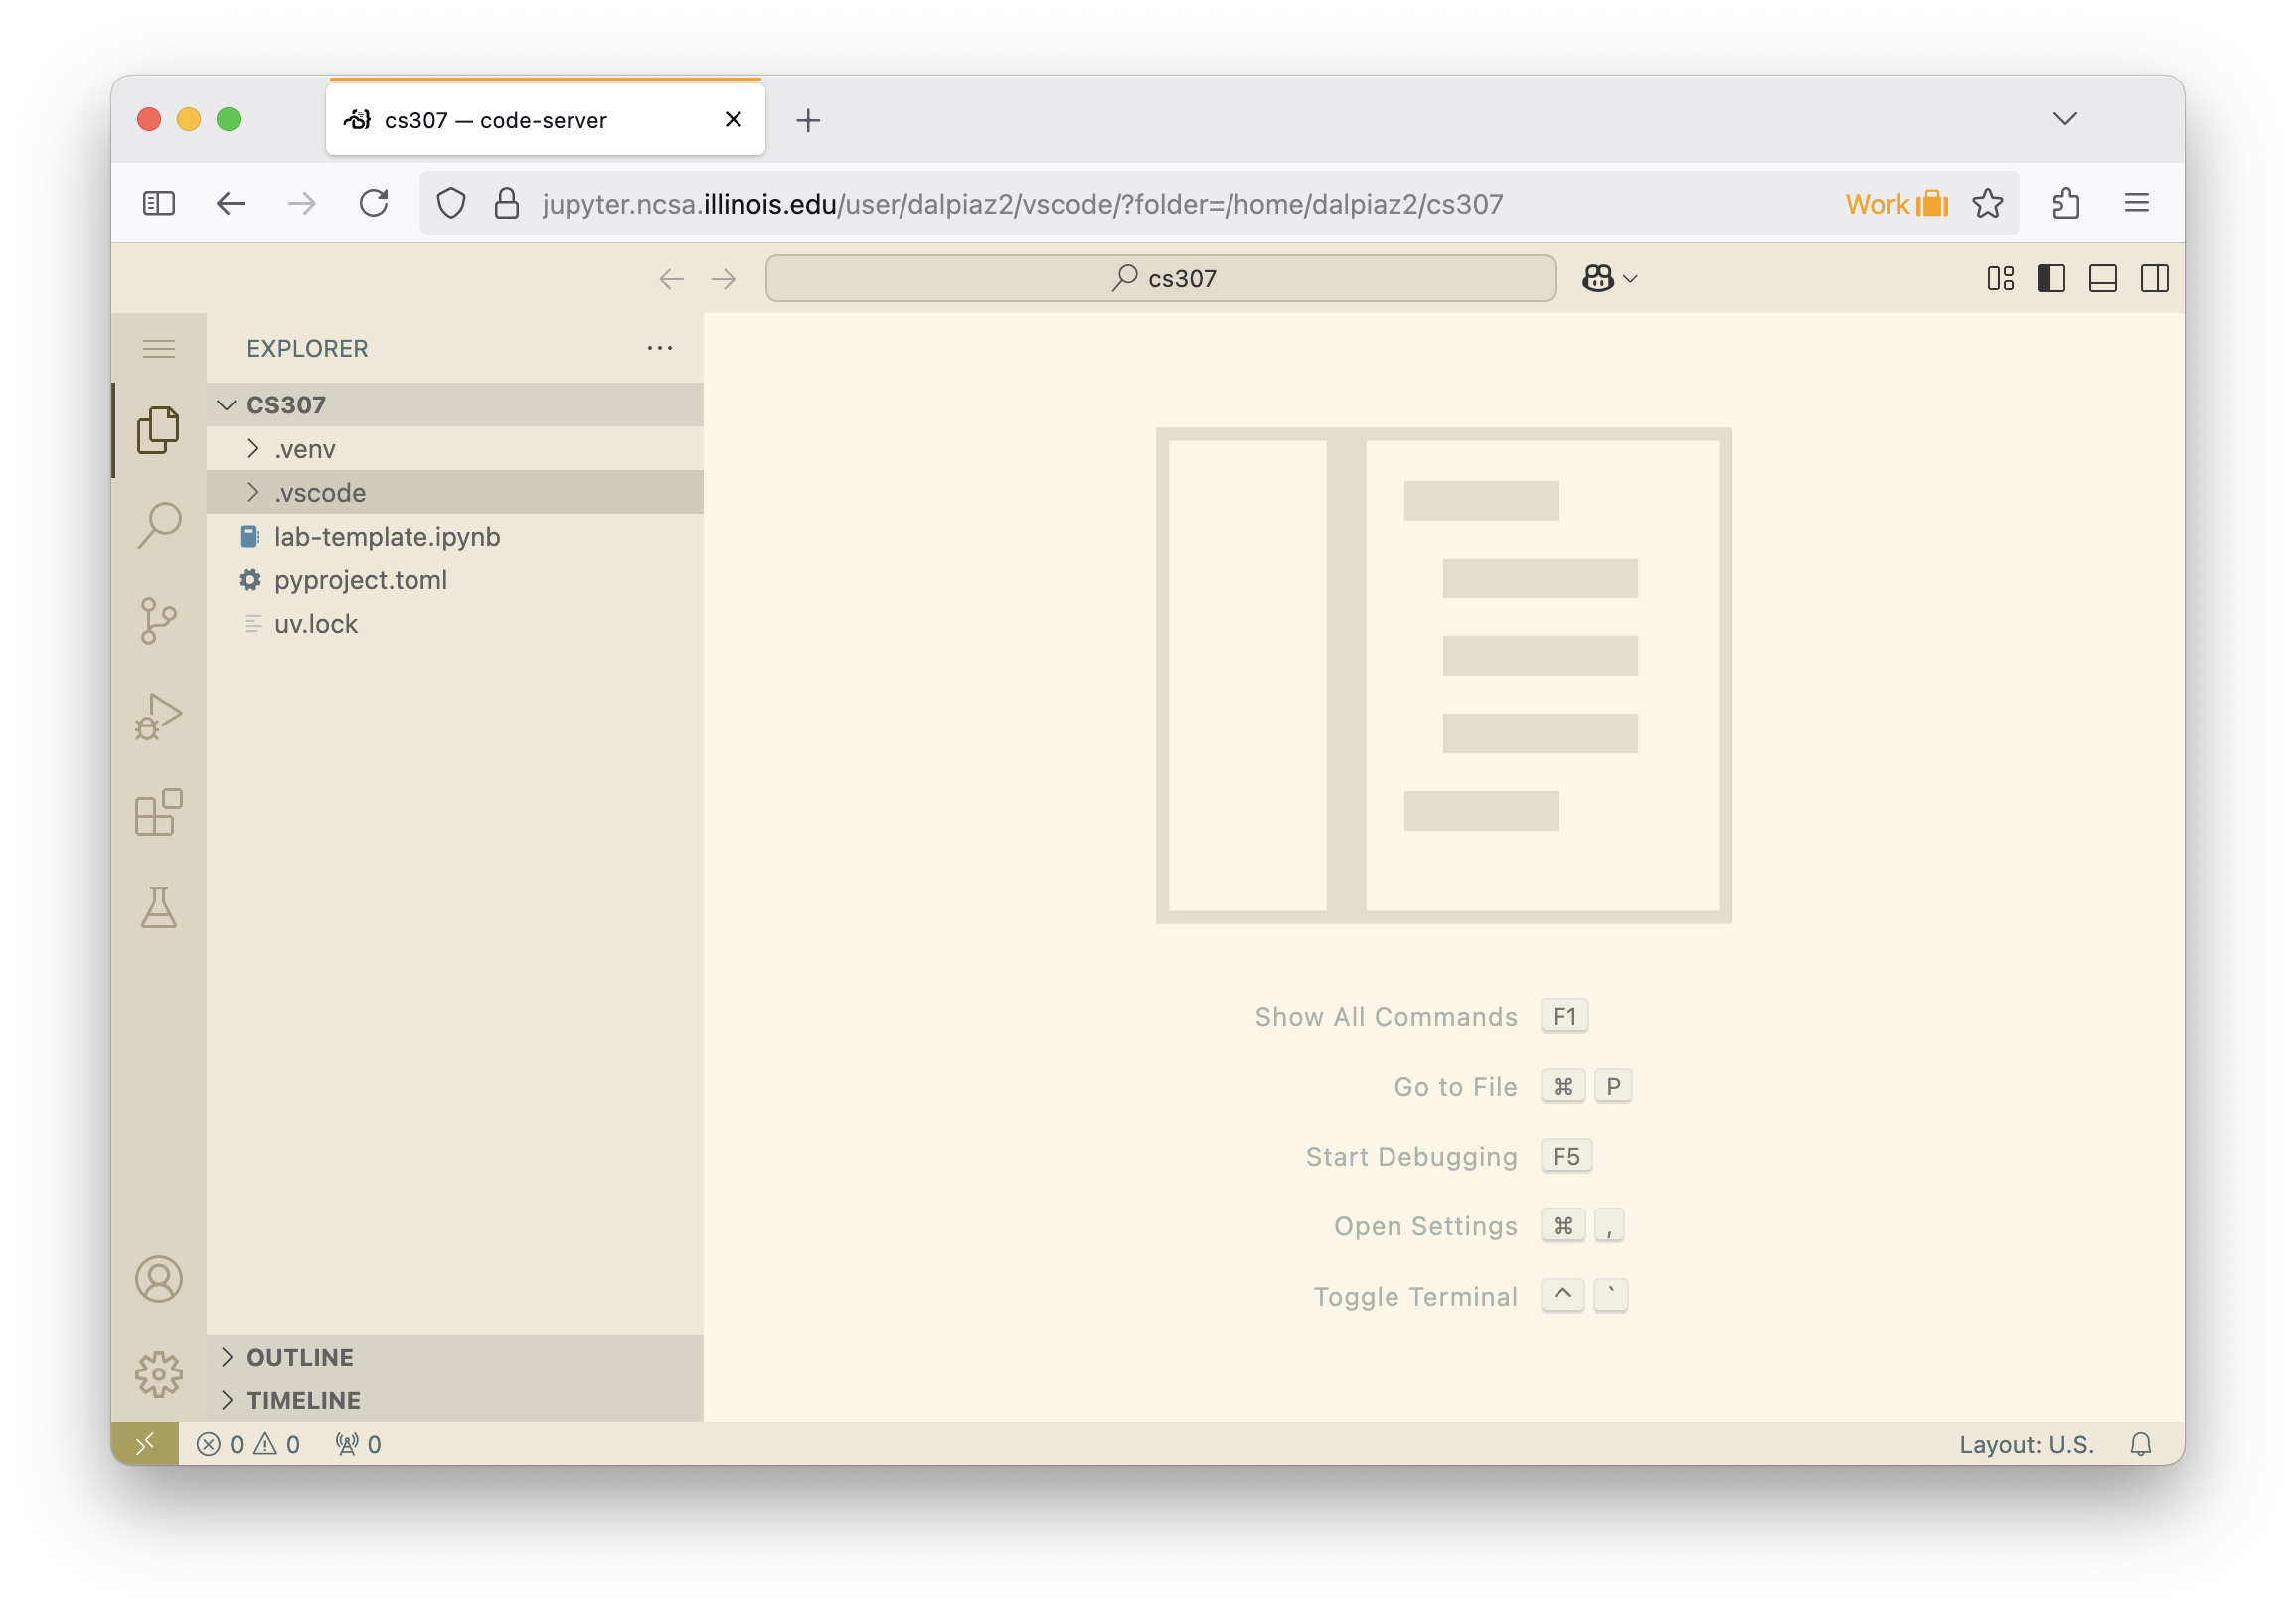
CS 307 Folder
Once the setup script has finished, you should now have all the necessary software, and a folder named cs307 in your home directory. Importantly, like the local setup, you need to open this folder in VSCode. Whenever working on CS 307 assignments, you should have the cs307 folder in VSCode.
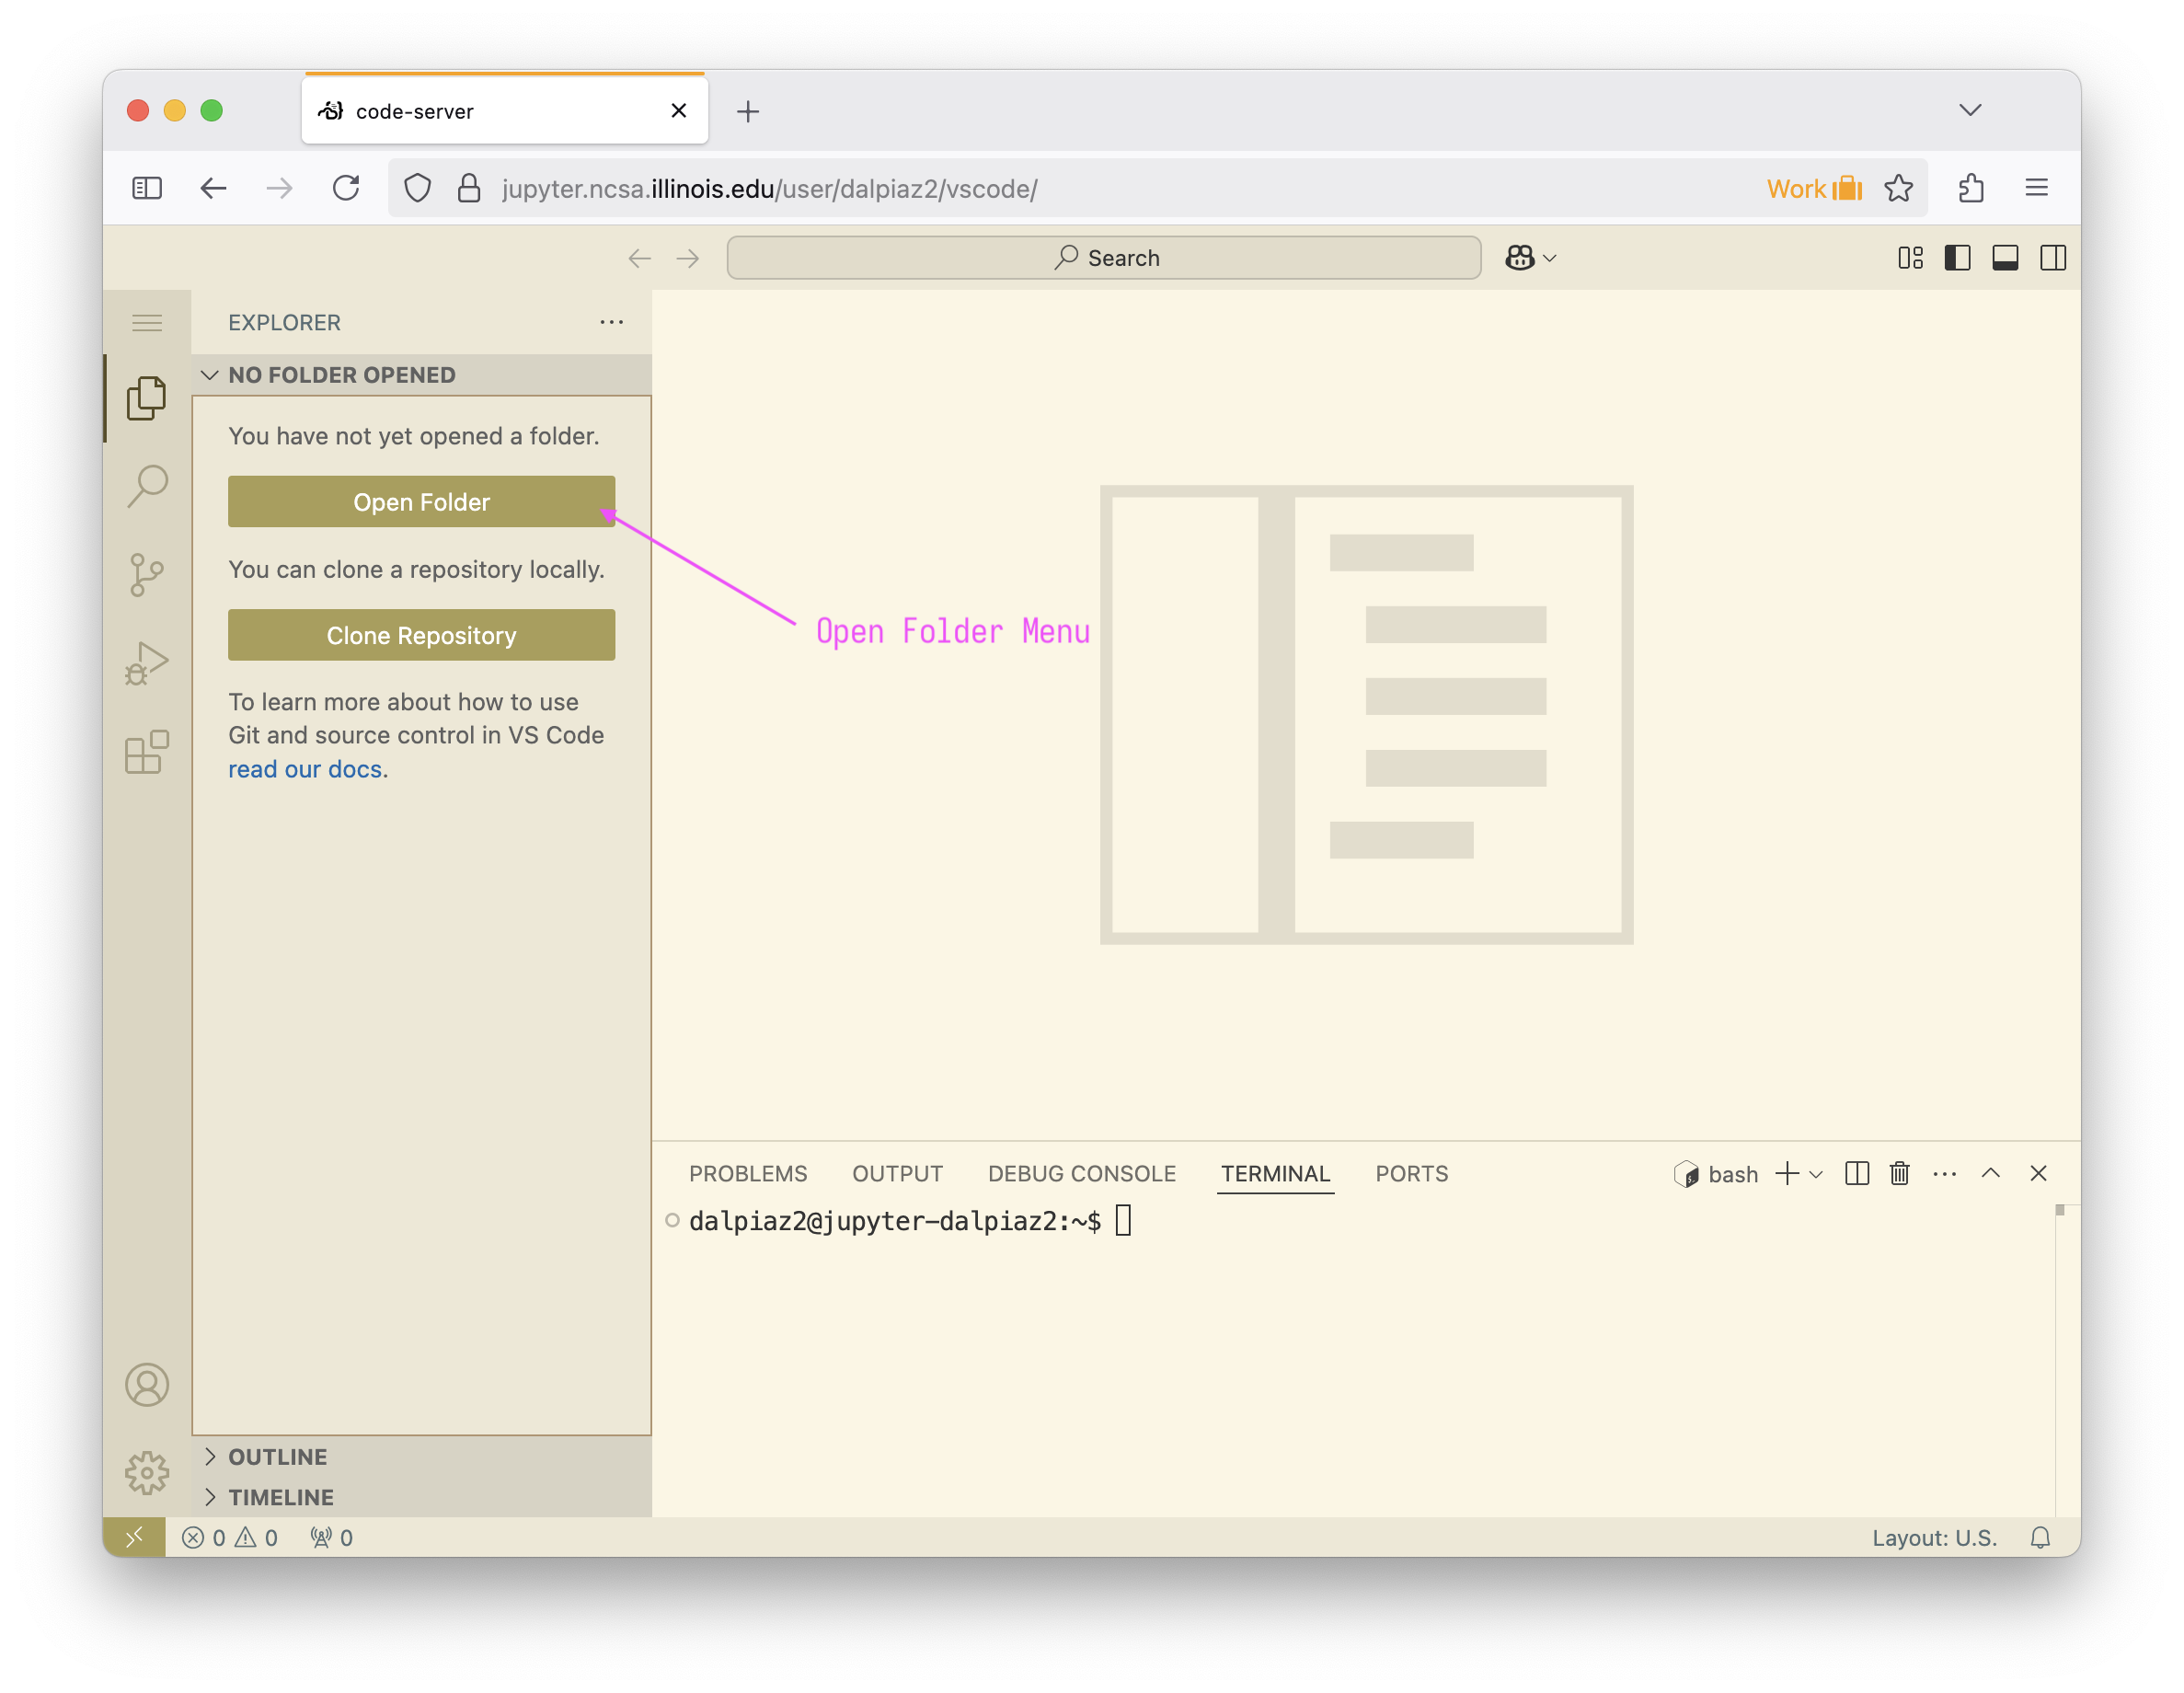
To open the cs307 folder, open the file explorer and click the “Open Folder” button as described in Figure 3
Figure 3: ICRN VSCode Open Folder
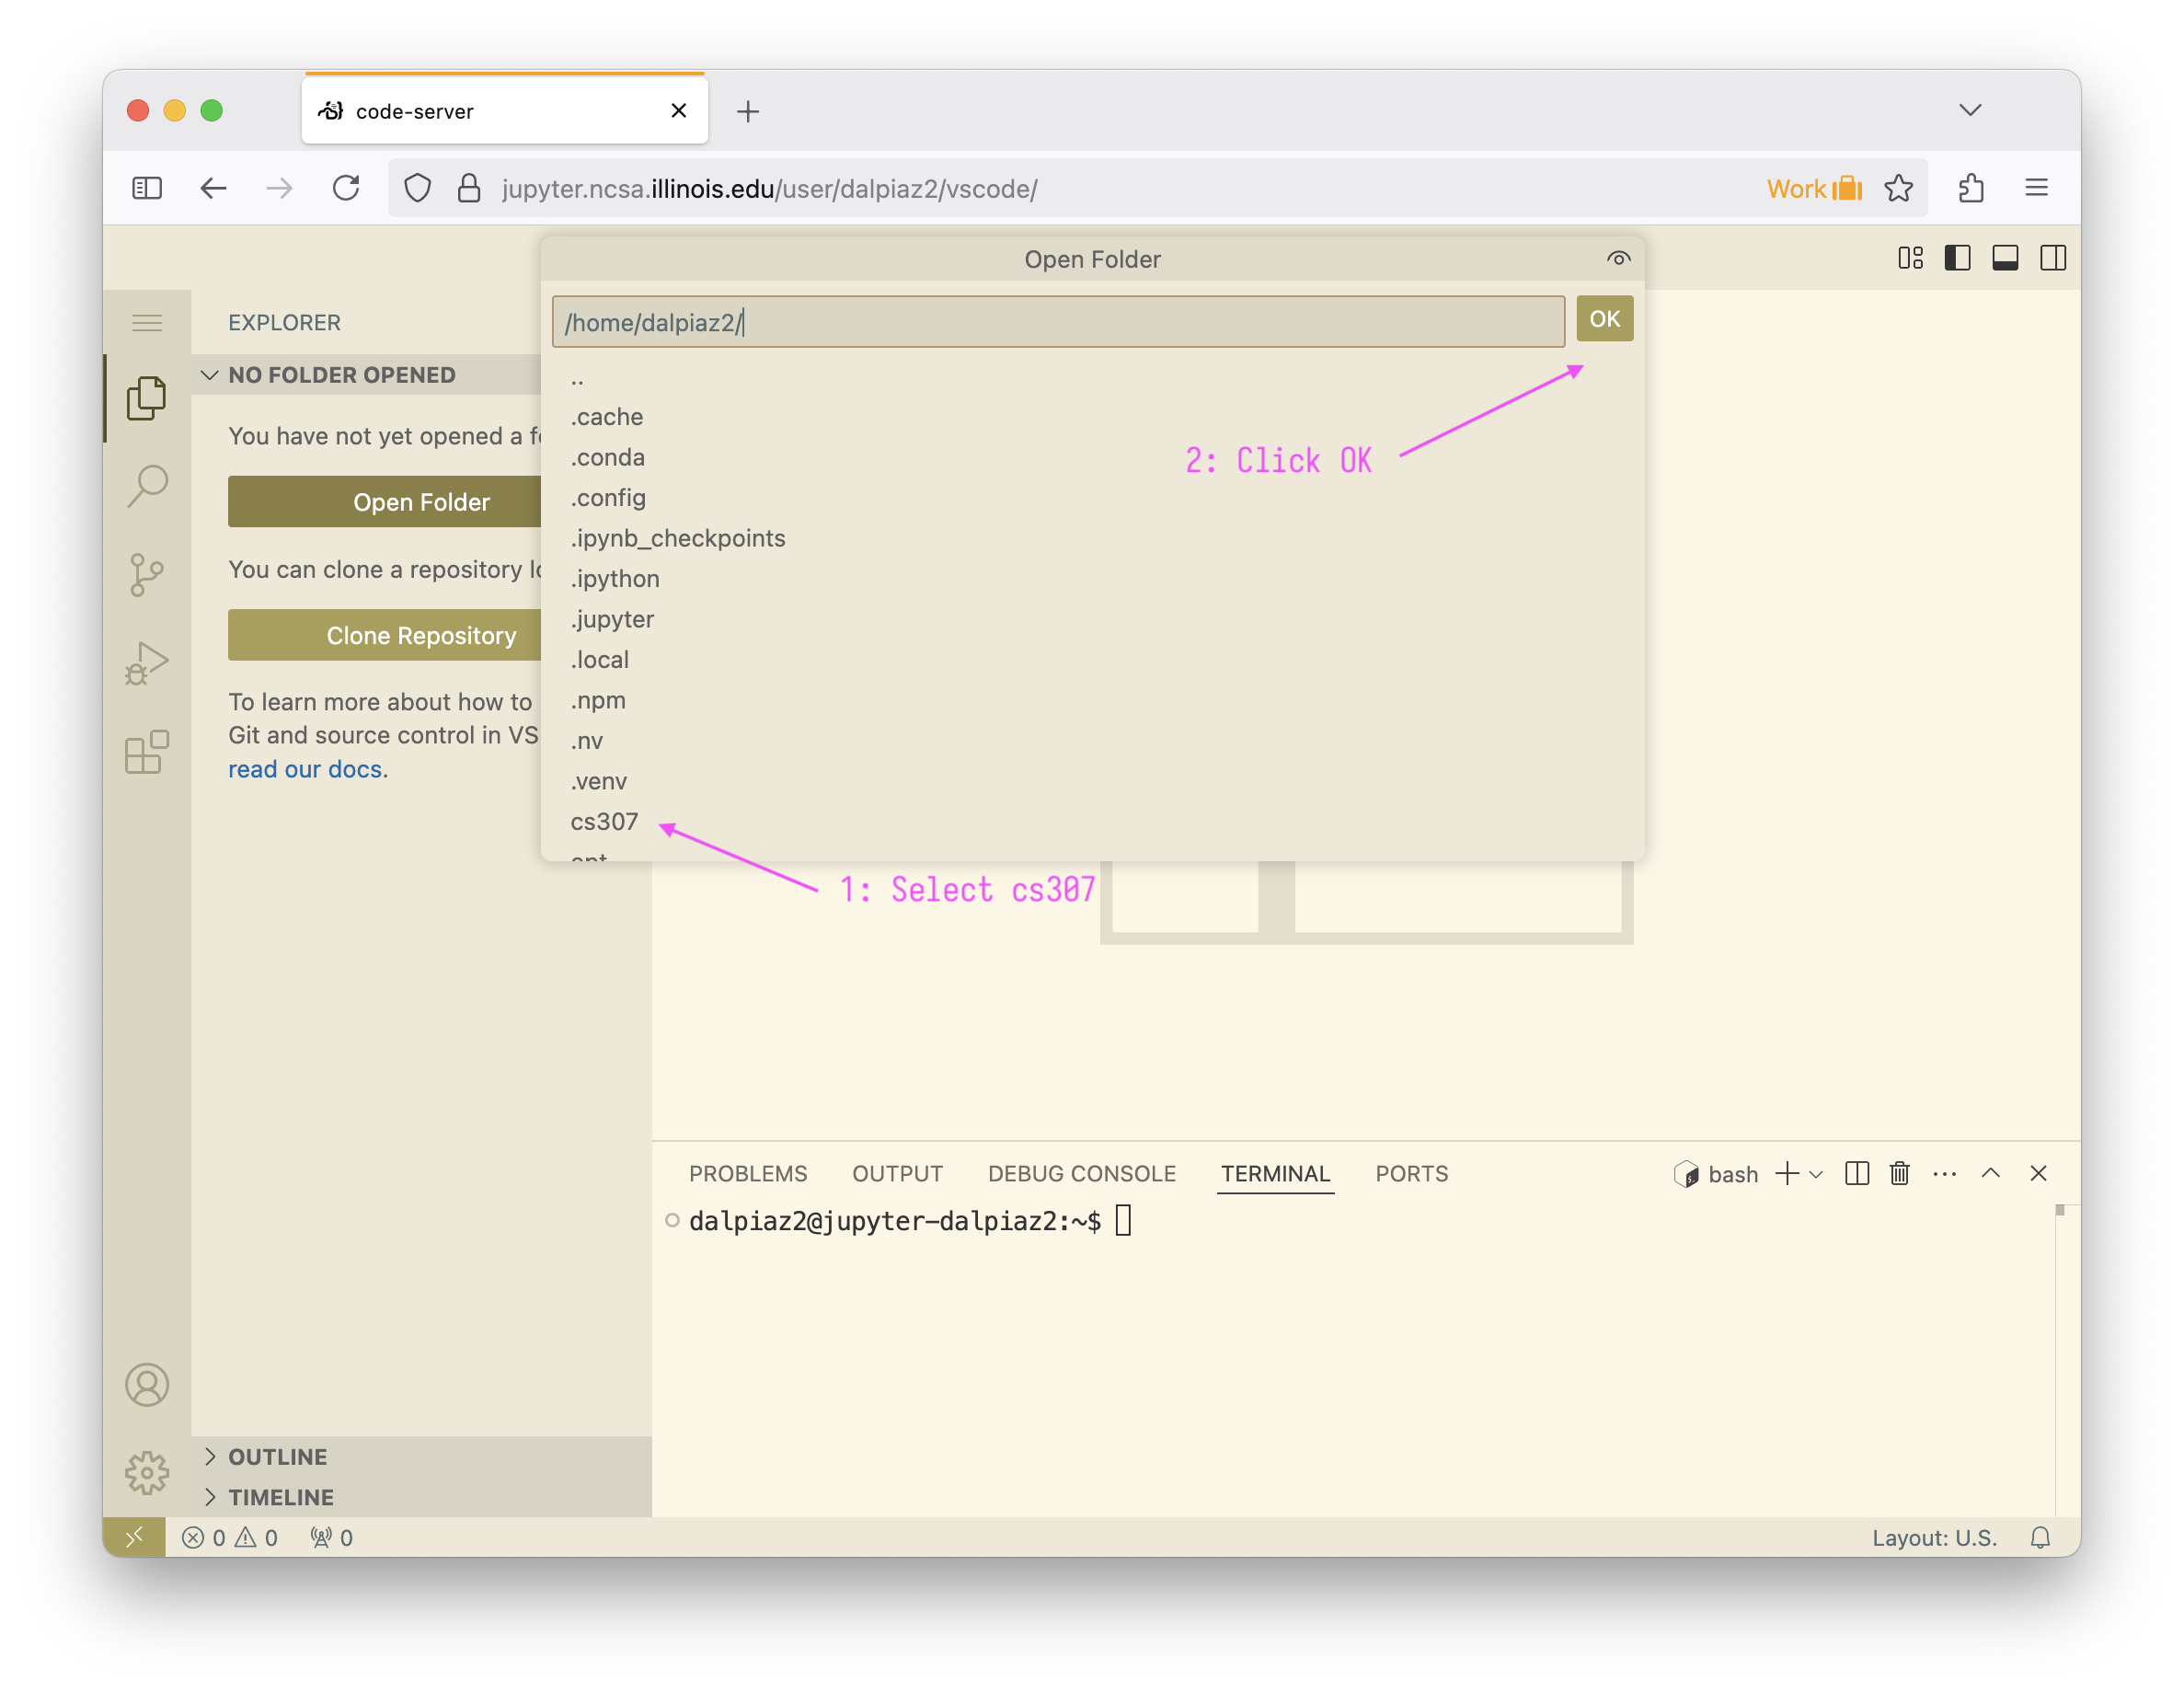
The “Open Folder” button will trigger a menu that allows you to select a folder to open, as seen in Figure 4. Click cs307 then click “OK” to open the cs307 folder.
Figure 4: ICRN VSCode Folder Selection
Your window will refresh and VSCode will reopen, now in the cs307 directory, which should include several files as seen in Figure 5
Figure 5: ICRN VSCode CS 307 Files
Downloading Files and Backups
Since the remote setup is running on a remote server, you do not have direct access to these files, or files you create, on your local machine.
To add files, you can simply drag and drop files into the file explorer.
The setup script added the file lab-template.ipynb to the cs307 directory. We recommend using this file to start all labs in CS 307. To do so, open a terminal and run:
cp lab-template.ipynb lab-01.ipynb
Be sure to substitute the correct lab number. This will create a new notebook, with the content of the template, ready to use for the lab.
To download files, such as the .ipynb and .html files to submit to Canvas for Lab Reports, simply right-click the desired file, and select the option to download.
ICRN is a new and free service. As such, they currently do not backup your files. While data loss is unlikely, you would be wise to backup your files. Importantly, we recommend downloading the .ipynb file for each lab and saving them locally. If ICRN were to lose data, you can simply re-add these files and regenerate .html files from them.
Quarto will mostly behave as it does locally. However, when running quarto preview you will need to pay attention to the popup in the bottom right, which will have an option to “Open in Browser” allowing you to preview the rendered file.
Local Setup
It is difficult to write instructions for a local setup that will always work. Every machine is different, and you may have taken steps to customize and configure your machine. The following instructions should work in the vast majority of cases. If for some reason they do not, please inform the course staff as soon as possible, and we will attempt to remove any roadblocks. However, please be aware that we recommend most users to attempt a remote setup as a first course of action.
While we provide instructions for a remote setup, we encourage you to at least attempt a local setup first. Having the ability to maintain a computing environment on your machine is a valuable skill, and we are happy to work through any issues you encounter along the way.
Update Your Operating System
Before you start, you should probably be sure your operating system (OS) is reasonably updated. However, don’t let this step hold you back, just realize that if you aren’t up-to-date, things could go wrong. In the past, we’ve discovered that some students have not applied operating system updates in years! This is terrible from a security perspective, but could also prevent some software from operating properly.
Before applying OS updates, make sure you can be plugged into power and without access to your machine for up to an hour. Also, as there is a small chance that things go wrong during updates, be sure you have any and all important files backed-up. You have a backup plan, right?
Install VSCode
First, you’ll need to install Visual Studio Code, which we will usually abbreviate as VSCode.
If you have previously downloaded VSCode, no need to re-install. However, if any updates are available, we recommend applying them.
On macOS, it is important that you properly install VSCode. We have often found that students do not do so correctly, mostly because Microsoft distributes VSCode in a somewhat odd manner compared to other macOS software.
After downloading VSCode, you must place it in your Applications folder. To check if that was the case for an existing installation, open VSCode, then right click its icon in your Dock. Select Options > Show in Finder. If installed correctly, this will open your Applications folder.
If not, you should quit VSCode. Be sure to quit, not simply close the window. Then, delete anything related to VSCode from your Downloads folder. Next, re-download VSCode. Take the file that is downloaded, and drag it to your Applications folder. Open that file from the Applications folder to launch VSCode.
Create CS 307 Directory
Create a directory (folder) for CS 307. You can create it anywhere you’d like, but your Desktop is fine. You can name it anything you want, but something like cs307 is recommended.
Next, open this folder in VSCode. There are various ways to do so, but selecting File > Open Folder... is the most straightforward.
You will use this folder to collect all things CS 307. Opening a folder rather than an individual file will provide several advantages when working in VSCode for CS 307. All instructions in CS 307 will assume that you are working inside this directory when using VSCode for CS 307.
Install uv
Rather than install Python, we will install uv. You must install uv even if you have previously installed Python.
With either OS, after installing uv, restart your terminal. The easiest way to do so is to fully quit then reopen VSCode. When you relaunch VSCode, be sure to also reopen your CS 307 folder if VSCode does not do so automatically. We will always assume you have this folder open when running commands in the future.
Setup Python
We will manage Python through uv. As a result, no need to install Python! Thankfully, uv will automatically take care of that for us.
Create a Virtual Environment
To ensure that you use the correct version of Python and Python packages, we will create a virtual environment.
To streamline this process, we have created a pyproject.toml specific to CS 307. Download this file, and place it in your CS 307 directory.
With that file in your directory, simply run the following in a VSCode terminal:
uv sync --compile-bytecode
This will install Python, and all necessary packages for CS 307!
If you use version control such as git, together with GitHub, be sure to add .venv to your .gitignore. The .venv folder contains an entire Python installation, which would be annoying to check-in to version control and push to GitHub.
With a virtual environment created, you should optionally activate it. This step is not strictly necessary, but will help avoid conflicts with conda.1
Many incorrectly assume that Jupyter is a Python specific tool. Very much not the case.
“Project Jupyter’s name is a reference to the three core programming languages supported by Jupyter, which are Julia, Python and R.”
Install Quarto
Use of Quarto is required to properly render lab reports in CS 307. To use Quarto together with Jupyter and VSCode, you’ll need to install both Quarto CLI, as well as the Quarto VSCode Extension.
Now, let’s test that everything is working properly.
Create a new Jupyter Notebook in VSCode. In the top right, click Select Kernel. If you see .venv (Python 3.13.*), select it! If not, chose Select Another Kernel, then Python Environments..., then .venv (Python 3.13.*).
Now, place the following in a Python cell and run it:
The first time you run code after creating a virtual environment will be potentially slow. This is a one-time issue, and future code will run as-expected.
Check Quarto
Save the notebook you were just working on as something like temp.ipynb. We’ll delete it when we are done. Now we need to render it, using Quarto, not Jupyter.
To do so, in a terminal, run:
uv run quarto preview temp.ipynb
Replace temp.ipynb with the name of whatever file you want to render.
Do not use Jupyter’s Export. This uses Jupyter, not Quarto. Doing so on labs will not be accepted.
Notice that a file named temp.html was created. You should see it in the Explorer panel. If VSCode did not do so automatically, open this file in a web browser to see the result.
To finish up, clean up your folder by deleting:
temp.ipynb
temp.html
temp_files
Updating the Virtual Environment
Throughout the semester, we may need to add additional packages to your virtual environment.